Renal-Friendly Kanom Gui Chai (Thai Chive Cakes)
For CKD and dialysis
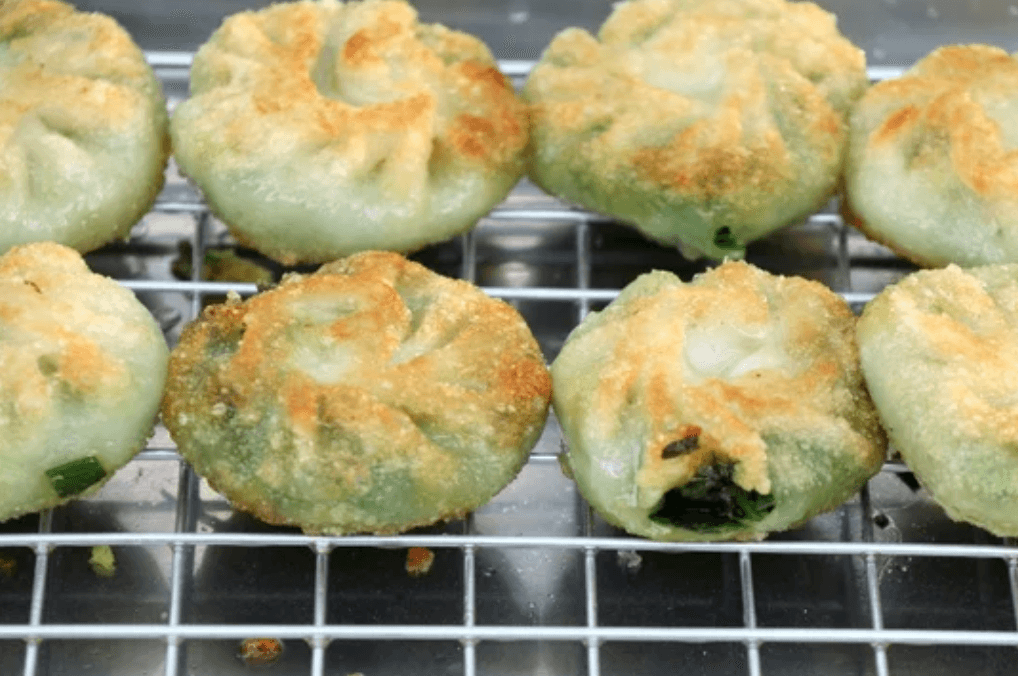
Translucent, chewy rice-flour dumplings packed with bright green garlic chives, pan-fried until crisp-edged and dipped in a sweet, tangy soy-vinegar sauce. A beloved Bangkok street snack, made at home.
No ratings yet. Be the first to rate it.Updated
- Prep
- 90 min
- Cook
- 30 min
- Total
- 120 min
- Total servings
- 8
- Serving size
- 1 piece
- Difficulty
- Medium
Ingredients
Chive filling
- 188 ggarlic chives, finely diced
- 2 clovesgarlic, finely minced
- ¼ tspsalt
- 1 tspwhite sugar
- ¼ tspbaking soda
- 1 tspolive oil or neutral oil
Dough
- 1 cupwhite rice flour, not glutinous rice flour
- ½ cuptapioca starch
- 2 cupswater, boiling; add gradually, you may not need it all
Dipping sauce
- 2 tbsprice vinegar or white vinegar
- 1 tbspless sodium soy sauce
- 1 tbspwater
- 2 tbspwhite sugar
- ½ tbspdark brown sugar
- 1whole red chili, thinly slicedoptional
To cook
- neutral oil, for greasing the steamer
- 1 tbspneutral oil, for pan-fryingoptional
Directions
Step 1: Season the chives
In a large bowl, toss the diced chives and minced garlic with the salt, sugar, baking soda and oil. Massage gently with your fingertips for about a minute, until the chives begin to soften and glisten.
Step 2: Drain the filling
Tip the chives into a colander set over the sink and let them drain for about 1 hour. Then press firmly with your palm to squeeze out the last of the liquid, and discard the liquid. The filling should look deep green and feel damp, not wet.
Step 3: Make the dipping sauce
While the chives drain, whisk the vinegar, low-sodium soy sauce, water, sugar and dark brown sugar until the sugar dissolves. Stir in the sliced chili, if using, and set aside so the flavors can mingle.
Step 4: Mix the dry flours
In a large heatproof bowl, whisk the rice flour and tapioca starch together until evenly combined.
Step 5: Knead the dough
Pour in the hot water a little at a time, stirring with a spatula, until a shaggy dough forms. When it is cool enough to handle, knead for 3 to 4 minutes into a smooth, pliable ball that no longer sticks to your hands. You may not need all of the water.
Step 6: Divide into portions
Divide the dough in half. Roll each half of the dough into an even log and cut it into 8 equal pieces. Keep them covered with a damp towel so they don't dry out.
Step 7: Roll the wrappers
Flatten one piece with your fingers, then roll it into a round about 3 to 4 inches across, slightly thinner at the edges than in the center.
Step 8: Fill and pleat
Spoon a generous mound of chive filling into the center. Draw the edges up over the filling, crimp them together at the top, then turn the dumpling seam-side down and press it gently into a thick pancake. Repeat with the remaining dough. You may have filling left over.
Step 9: Steam until translucent
Lightly oil a steamer basket and arrange the cakes with a little space between them. Steam over boiling water for 8 to 10 minutes, until the dough turns glossy and translucent and the green chives show clearly through.
Step 10: Pan-fry for crisp edges
Heat the oil in a nonstick skillet over medium heat. Fry the steamed cakes for 2 to 3 minutes per side, until golden and lightly crisp. Alternatively, cool the steamed cakes completely and freeze them for later, frying straight from frozen over slightly lower heat.
Step 11: Serve with sauce
Serve the cakes hot, with the dipping sauce on the side for drizzling a little over each bite.
Products used
As an Amazon Associate I earn from qualifying purchases. Some links are affiliate links, at no cost to you.
Reviews
No reviews yet.
Sign in to rate and review this recipe.